How to Install YetiForce CRM: Step-by-Step Guide for Beginners

Extract the contents from the file.
Upload the directory to the web server.
Begin the installation process by launching the wizard from the web directory where you’ve copied the files, and then follow the on-screen instructions.
You can also take advantage of the bash console.
cd /var/www/html/
wget -O YetiForceCRM.zip https://github.com/YetiForceCompany/YetiForceCRM/releases/download/6.2.0/YetiForceCRM-6.2.0-complete.zip
unzip YetiForceCRM.zip
Step 1: Launch the Installation Wizard
Open the target address of your system in a browser. The installation wizard should appear. If it doesn’t, there may be an issue. Try accessing the following address instead: https://
On the welcome screen, you’ll find options to select your preferred installation language (with the browser’s default language selected automatically) and choose the installation mode—whether you’re starting a fresh installation or migrating from another system. In this guide, we’ll walk you through the steps for a new installation. Click Install and proceed to the next step.
Step 2: Review and Agree to the License Terms
It’s necessary to agree to the license terms in order to proceed with the installation process. The YetiForce License is very similar to the standard MIT license, it allows modification of the code and to leave information about the initial developer. We recommend reading the license.

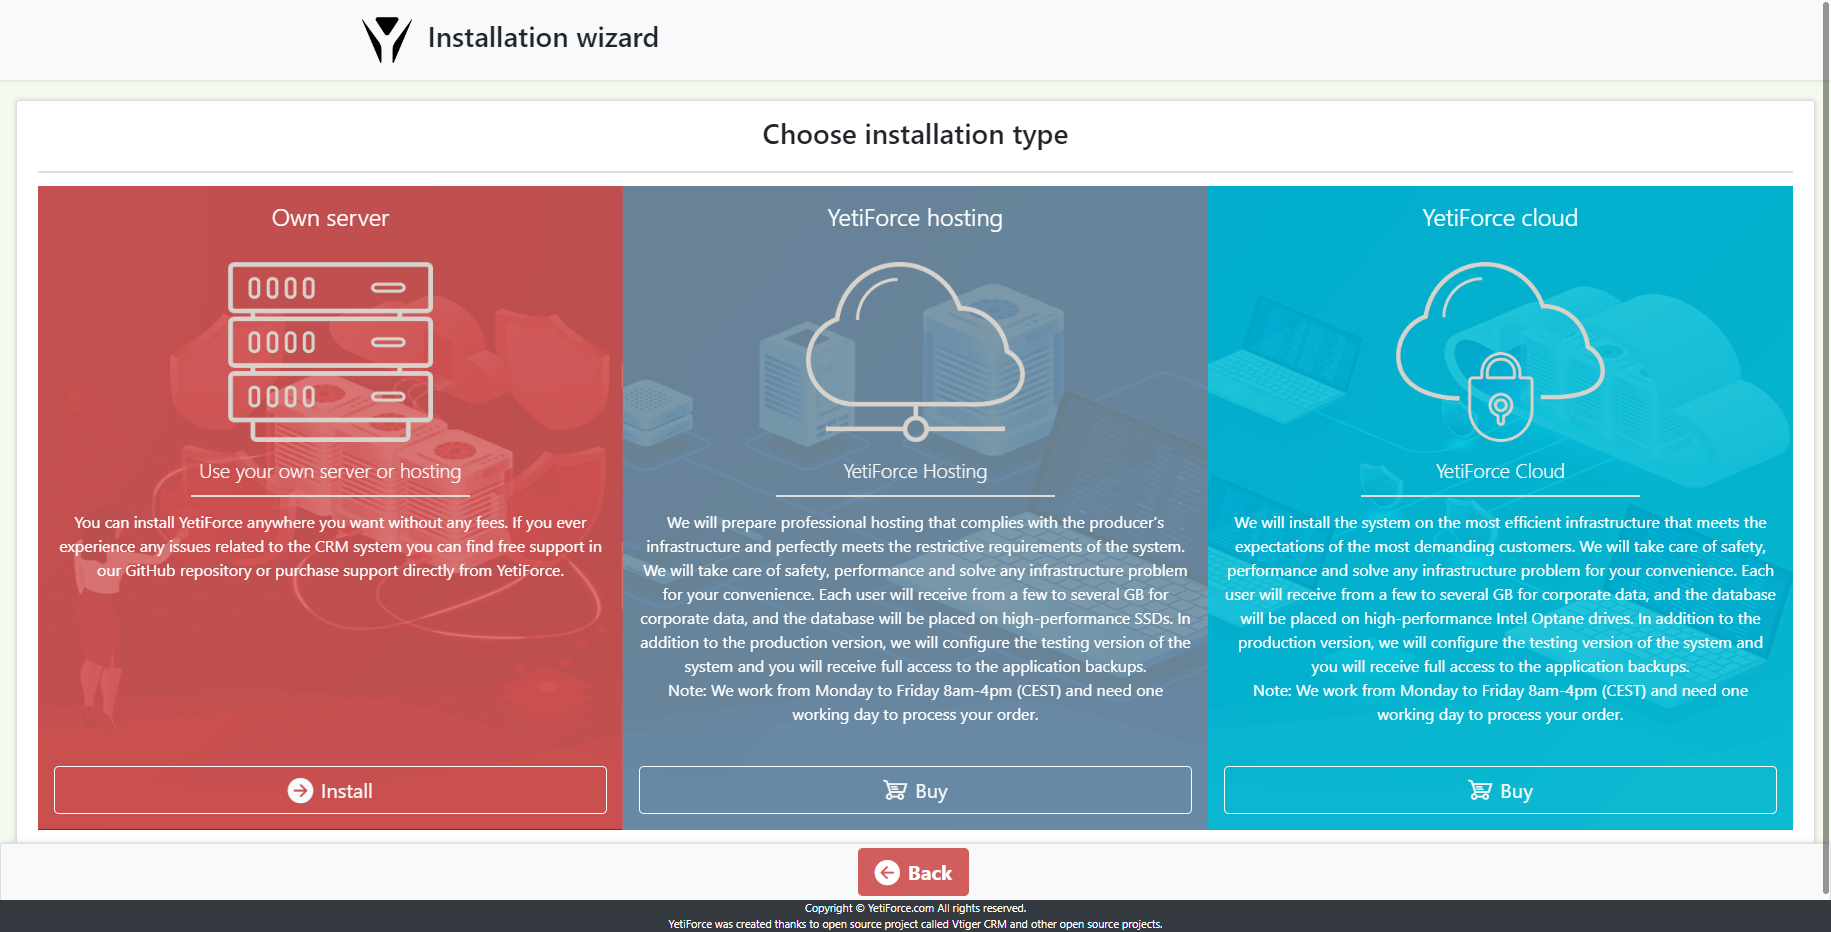
Step 3 : Choose installation type
Decide where to install your system. Opt for self-hosting for maximum control, or take advantage of our managed hosting and cloud services for ease of use, scalability, and expert support. When ready to purchase, click ‘Buy’ to begin the secure payment process.
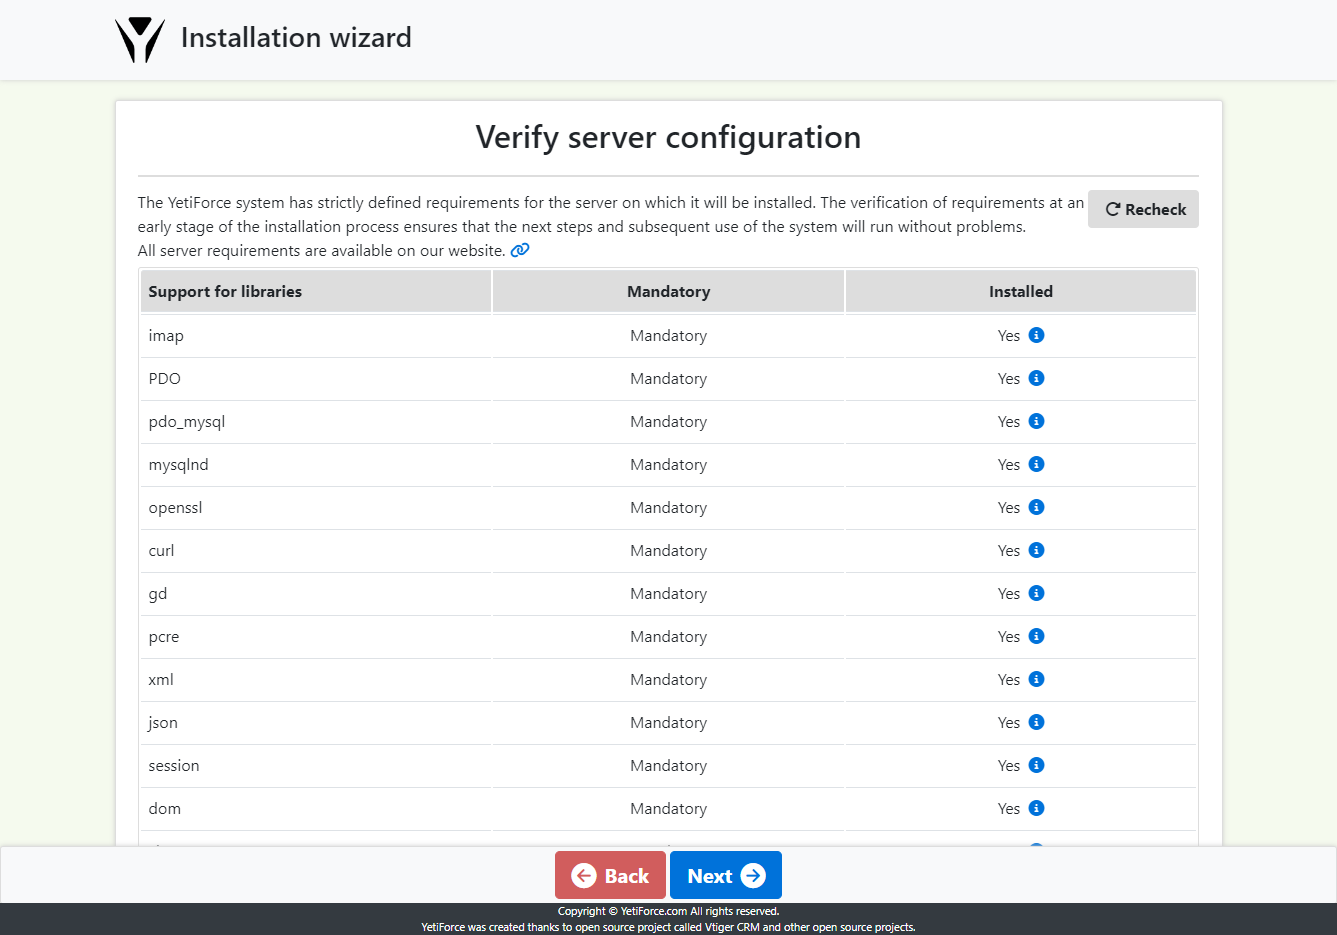
Step 4 : Server configuration review
Discover how your current web server configuration stacks up against YetiForce’s requirements. This guide will show you exactly what needs to be adjusted and to what values to achieve optimal performance.
Once you are aware of the risks associated with incorrect web server configuration you can click “OK”, and move to the next step.
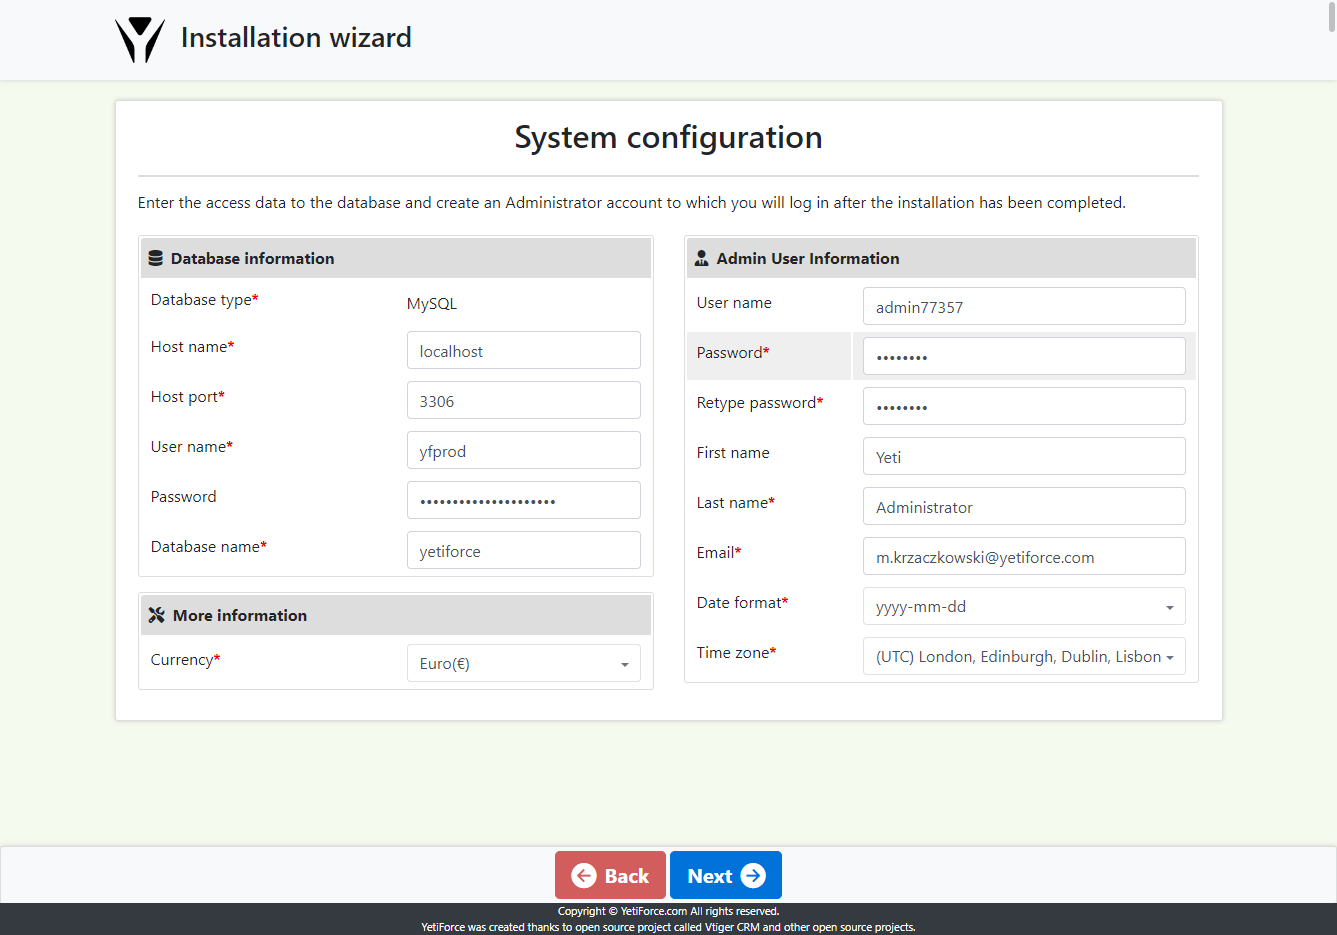
Step 5 : Access data configuration
To begin, you’ll need to provide access credentials for your database and configure output parameters for the system. If enabled, a new database will be created based on this information. This process will involve copying the database structure, including initial records, and creating an administrator account. Upon successful installation, you can use these credentials to log in.
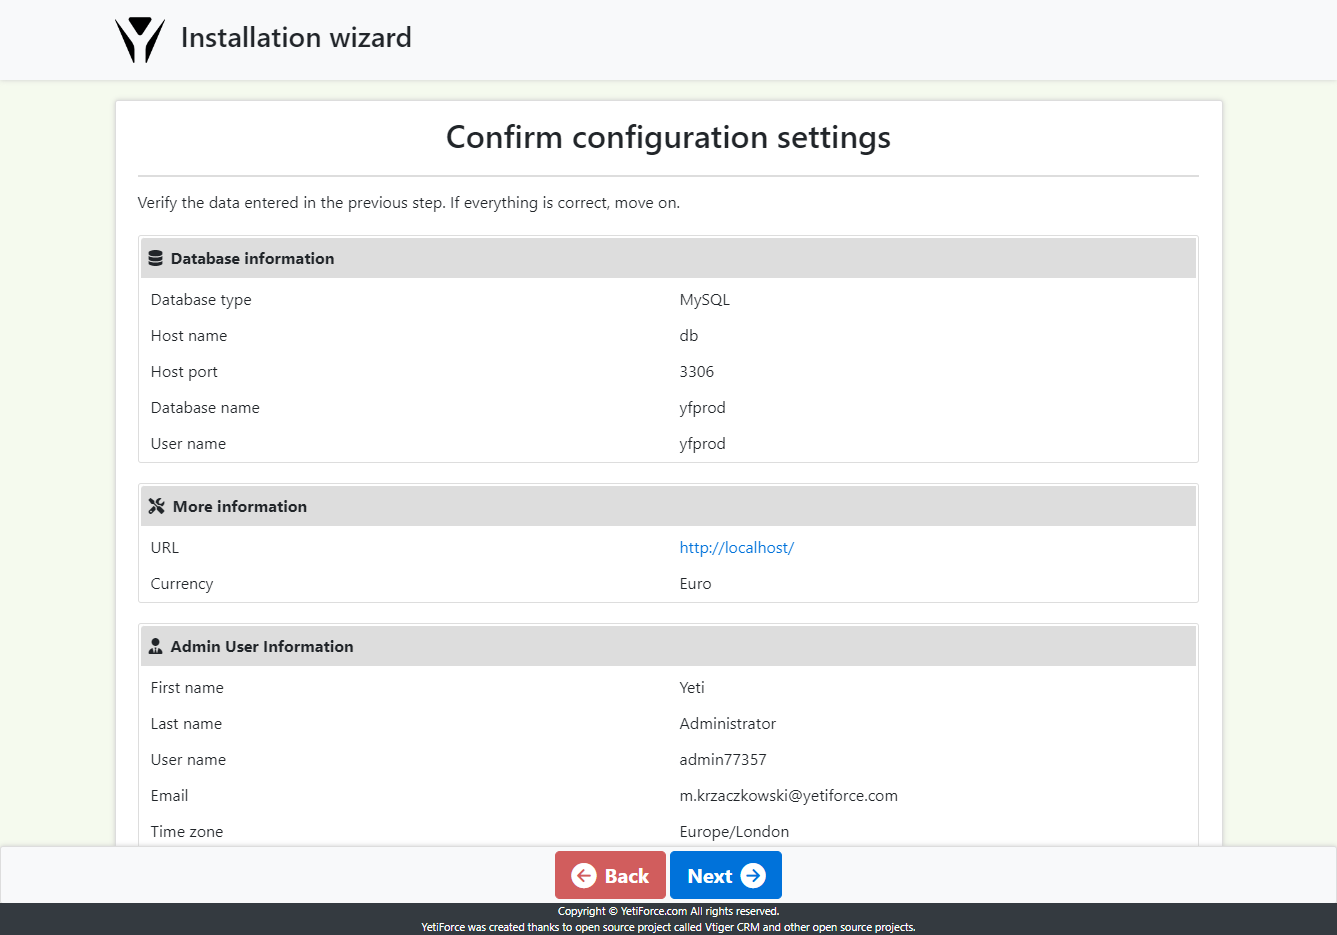
Step 6 : Data summary
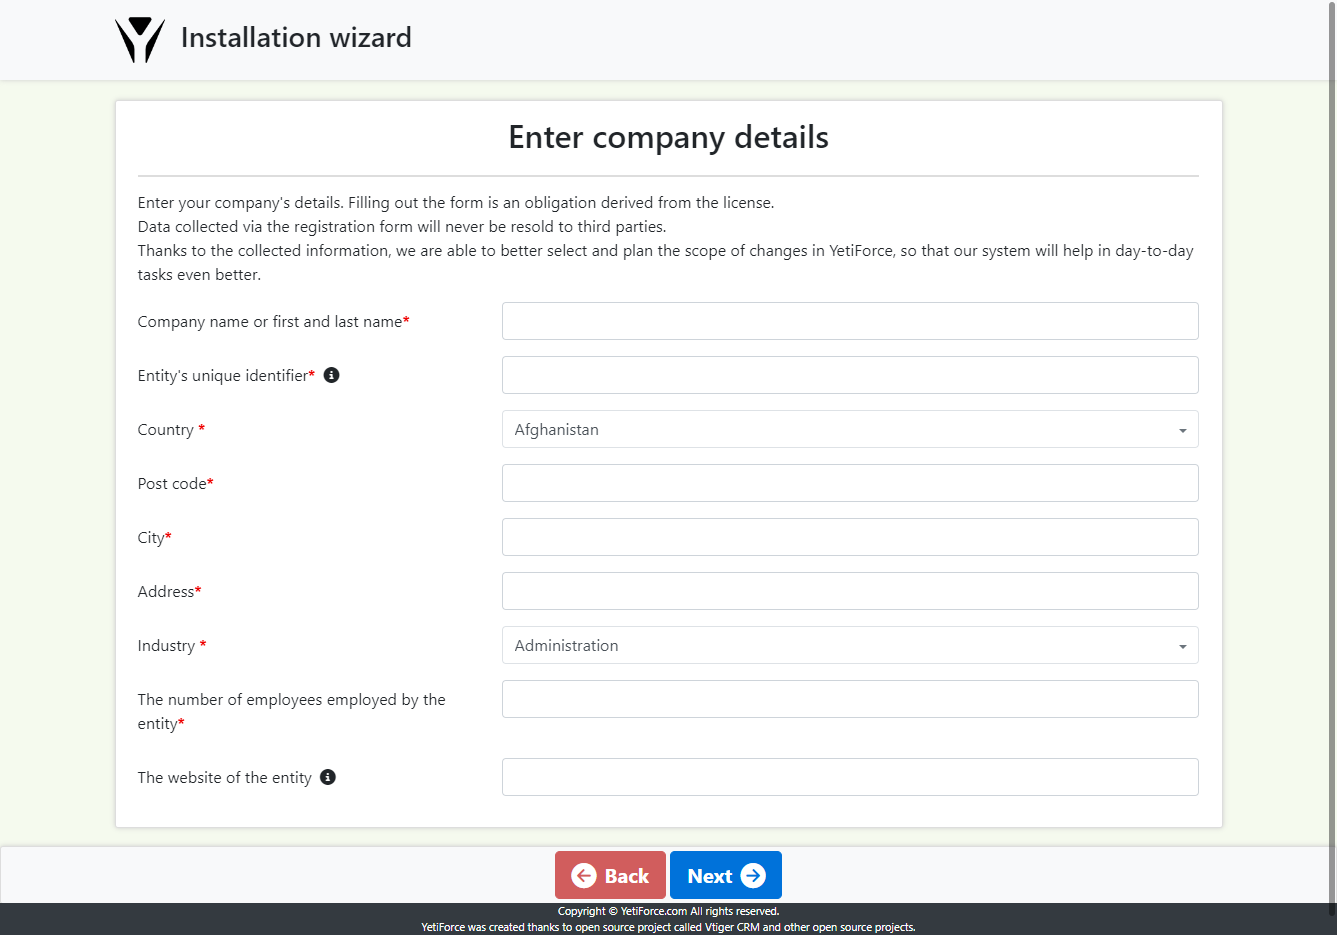
Step 7 : Enter registration information
Enter the data of the company that will use the system, the data will then be used to register the system.
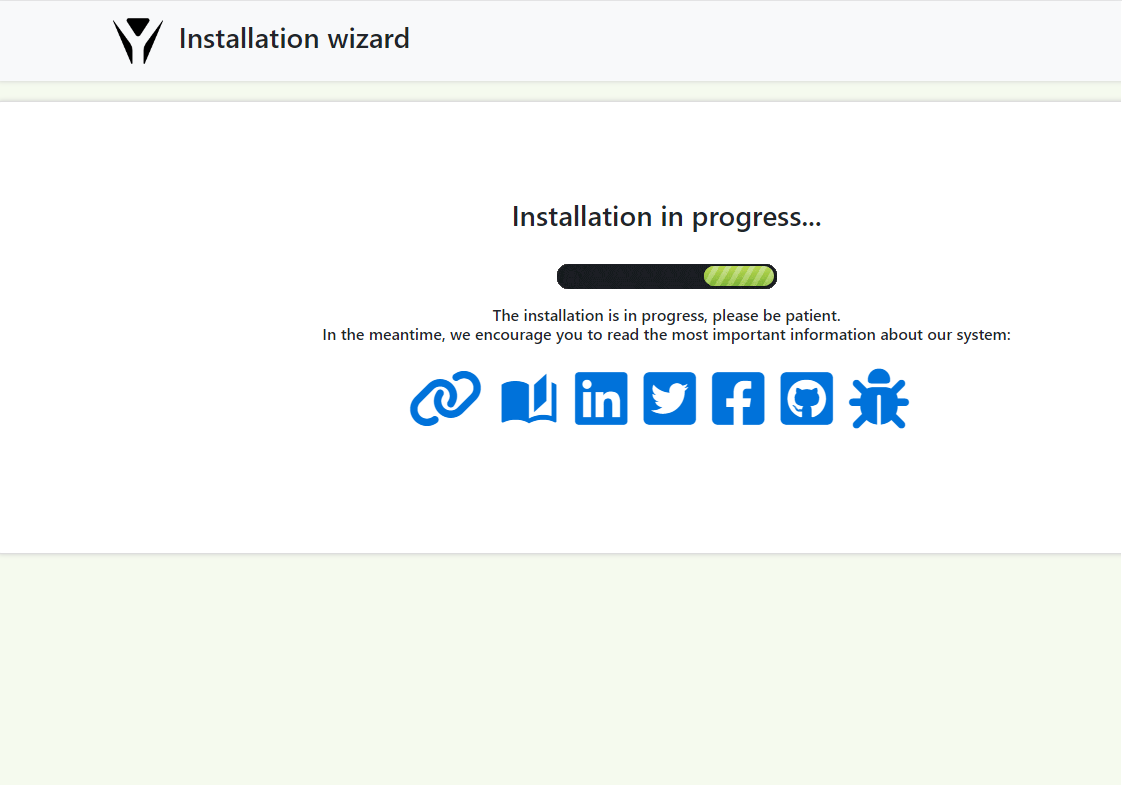
Step 8 : Database import and system configuration
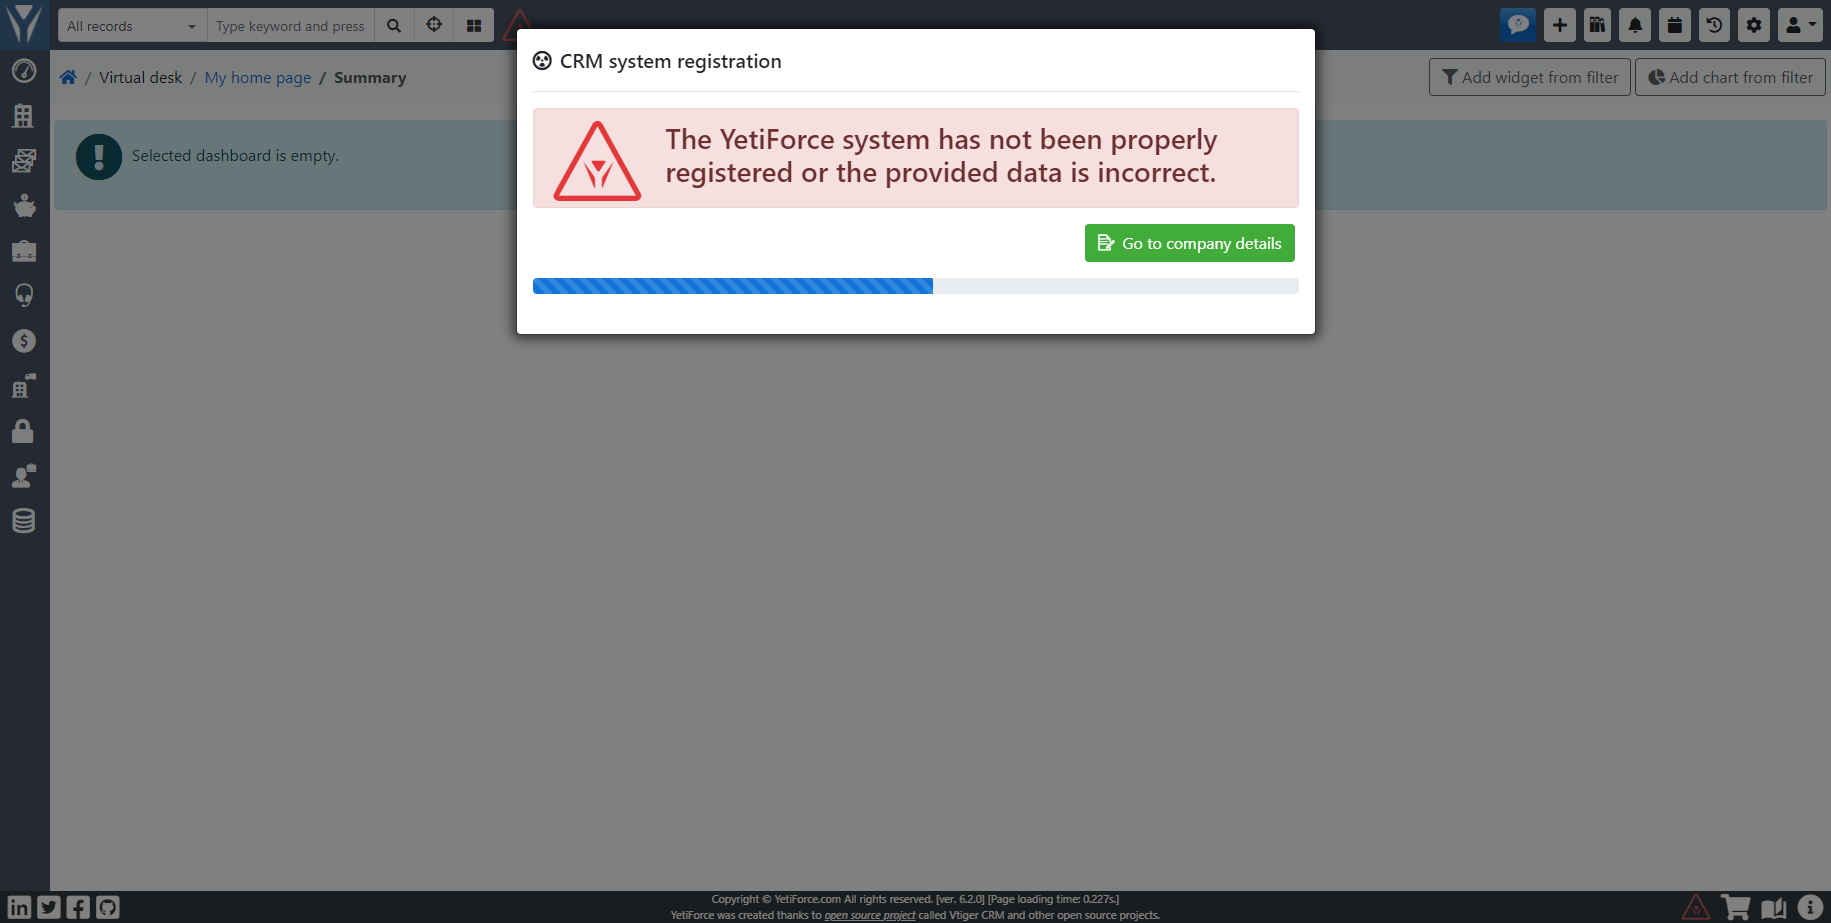
When the installation is performed correctly, you will be automatically redirected to the system.
Enjoy!
Getting installation process failed!
What to do when the system shows the message Invalid session ID at the beginning of the installation.
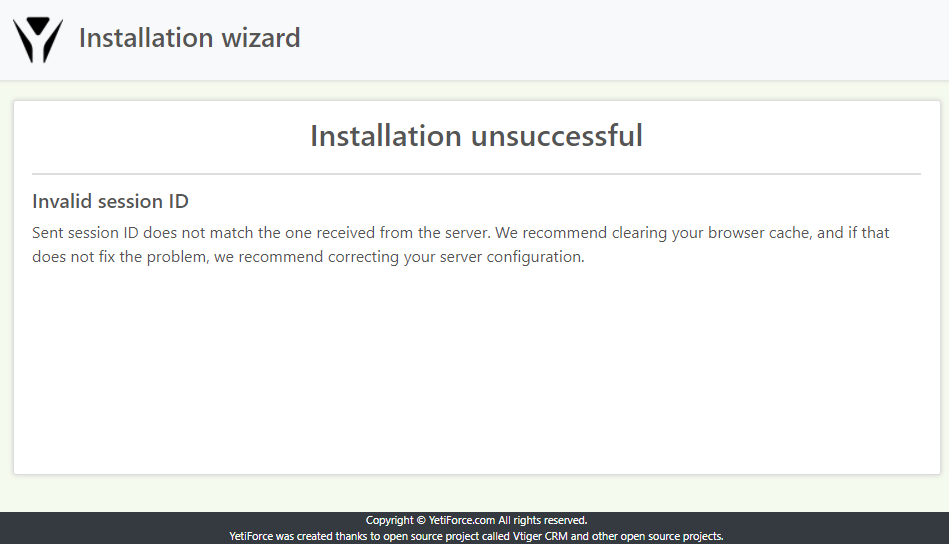
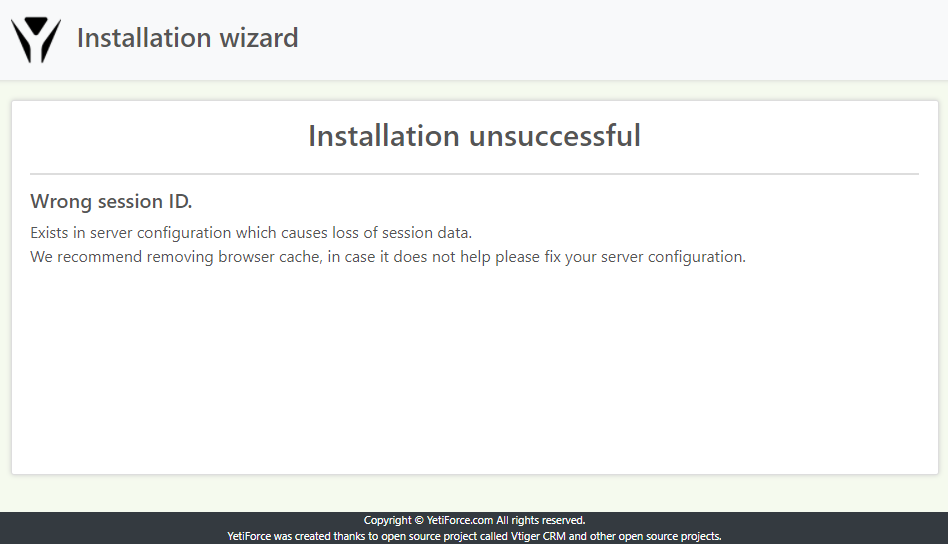
What does the message Invalid session ID mean?
“Sent session ID does not match the one received from the server. We recommend clearing your browser cache, and if that does not fix the problem, we recommend correcting your server configuration.”
The error often appears when there are (or there were) several instances of different system versions on one address. Different system versions have different cookie configurations, and therefore sometimes the session ID cannot be updated during installation.
This can be checked in the browser console:
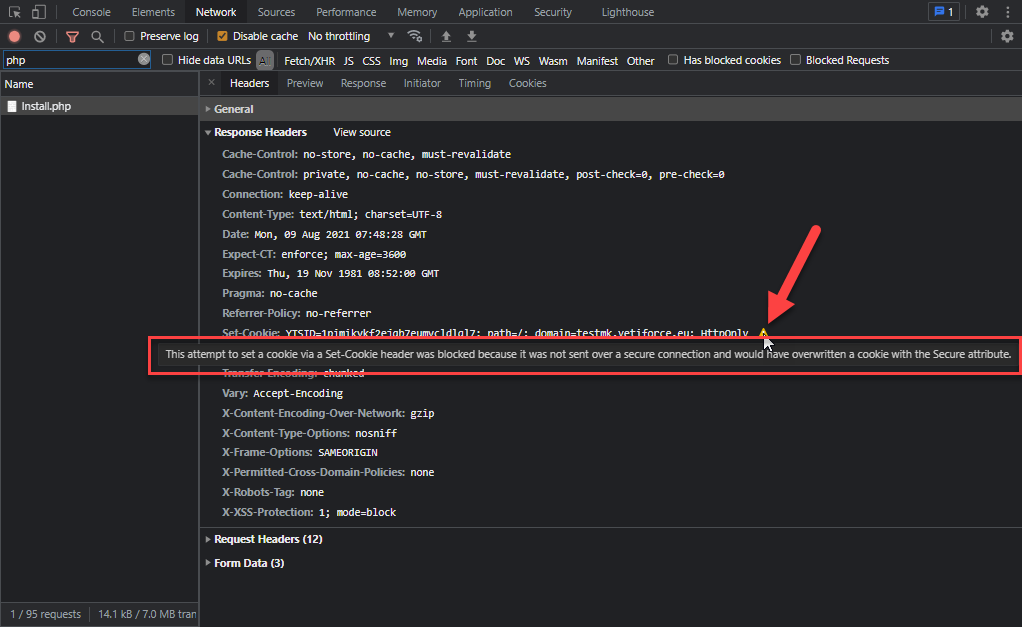
How to repair invalid session ID
The repair is simple, it is required to delete the browser cache or delete all cookies for the domain (which the system is running on).
HTTP

HTTPS
